Add the website live chat widget
The WebChat widget is a small script you paste onto your site. It's pre-connected to your unified inbox, answers from your knowledge base, and hands off to a human when needed.
Set up the WebChat widget
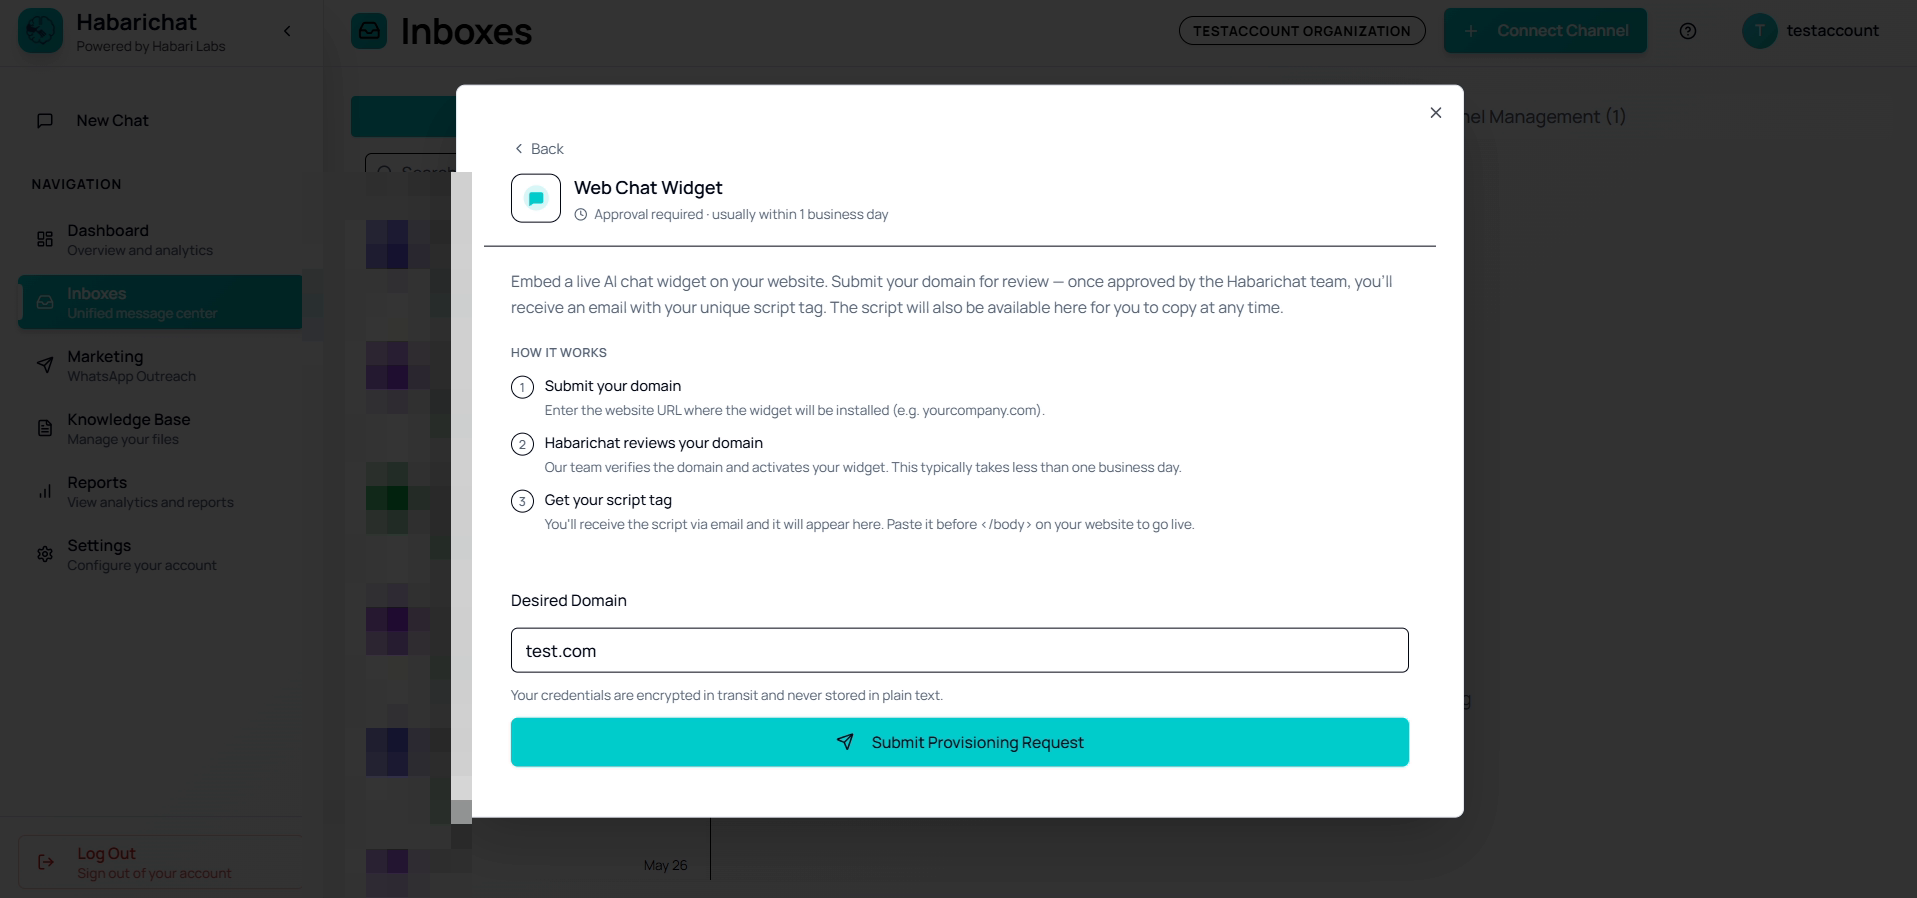
You submit your domain for a quick review, and once approved you receive a single script tag to paste onto your site. From then on visitors get instant AI answers, and any chat can be picked up by your team from the same inbox as WhatsApp and Messenger.
- Access to your HabariChat dashboard and your website domain.
- The ability to edit your site's HTML (or a plugin / code section that lets you).
- A knowledge base already uploaded, the widget answers from your documents.
Steps
- Go to Settings → Channels, click Connect Channel, select Web Chat Widget, and click Connect.
- Enter your website domain and submit it for review (approval usually takes about one business day).
- Wait for the approval email with your unique script tag (it also appears in your dashboard once approved).
- Paste the script tag just before the closing tag on every page where you want the widget:
- WordPress: use a headers-and-footers plugin and add it to the footer.
- Wix / Squarespace / Webflow: use the custom code or footer code section in site settings.
- Visit your website and test the chat bubble in the bottom-right corner.
Common questions
After you submit your domain for review, approval usually takes about one business day. You then receive a unique script tag by email, which also appears in your dashboard once approved.
Paste the script tag just before the closing body tag on every page where you want the widget. On WordPress use a headers-and-footers plugin and add it to the footer. On Wix, Squarespace, or Webflow use the custom code or footer code section in site settings.
The widget answers from your uploaded knowledge base, so upload your documents first. Make sure autoresponse is enabled in the channel settings, and it will hand off to a human agent when needed.