Connecting Channels
Connect WhatsApp, Facebook, Instagram, Telegram, email, and your website so every customer message lands in one inbox. All channels are included on every plan, and you can connect as many as you like. Start with the general flow below, then open the step-by-step guide for your channel.
Connect a new channel
Every channel, WhatsApp, Facebook, Instagram, Telegram, email, and your website, is connected from the same place in your dashboard. The general flow is always the same; only the authorisation step differs per channel.
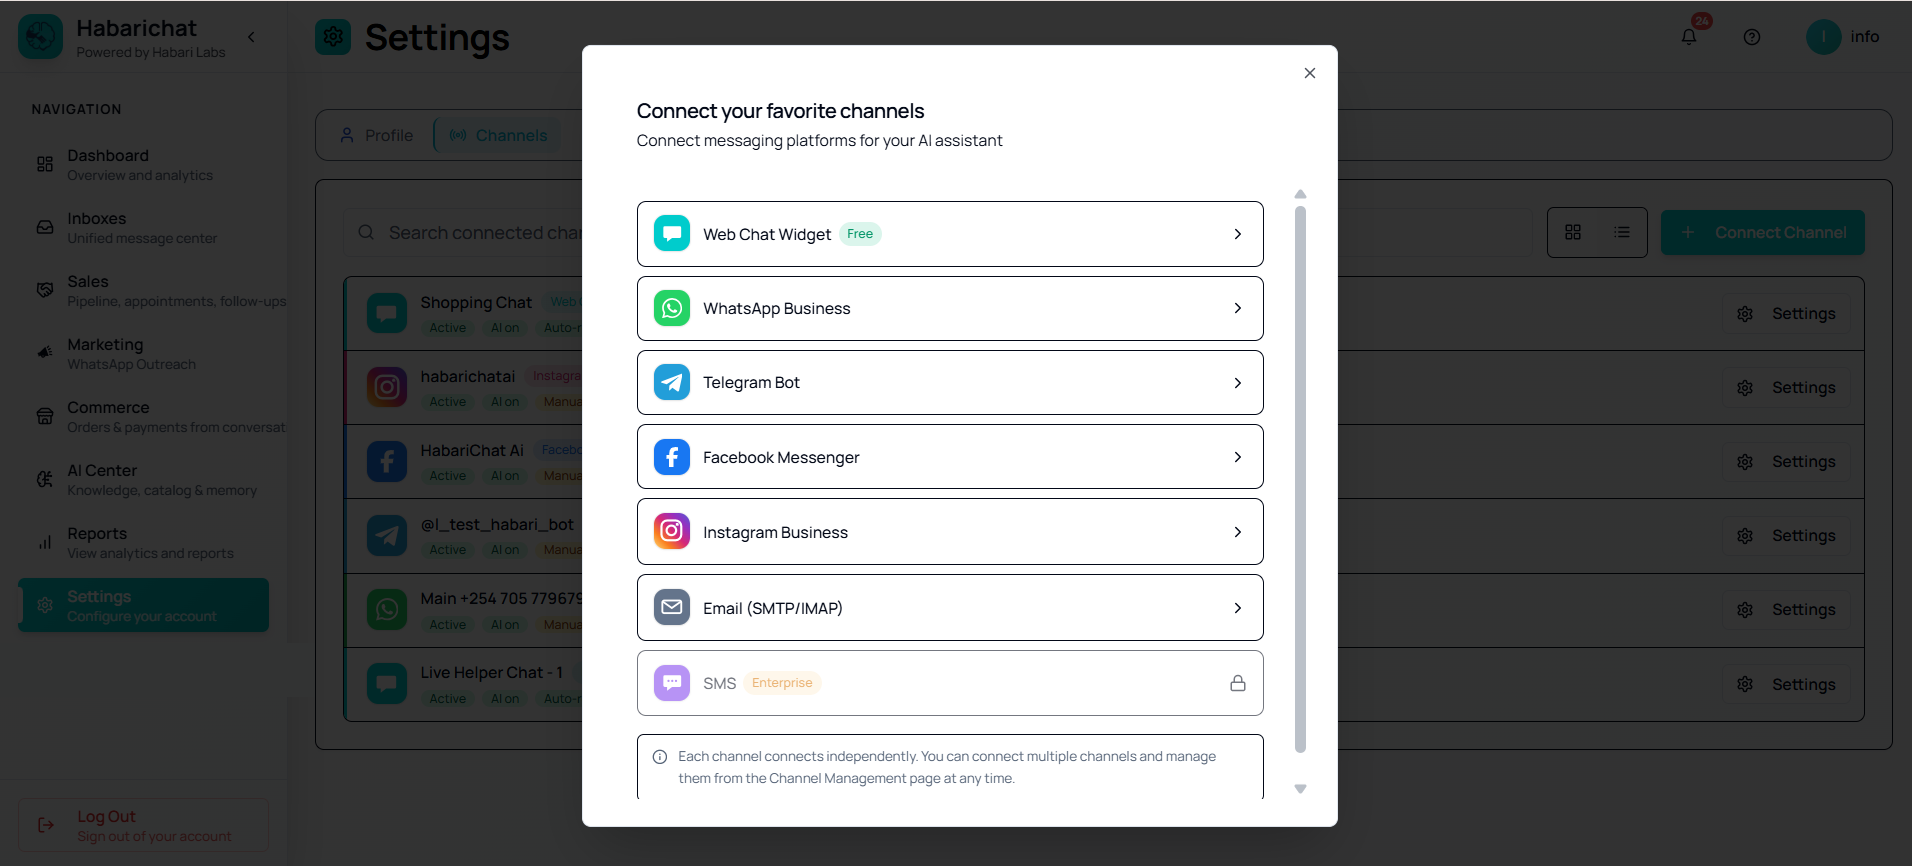
- You must be logged in to HabariChat.
- Have the account that owns the channel ready (Meta Business account, Facebook Page admin, Telegram, or email credentials).
- Click Settings in the left navigation, then open the Channels tab.
- Click Connect Channel, top right.
- Choose the channel you want to add.
- Follow the channel-specific guide below.
- When it's done, send a test message and confirm it lands in your inbox and that the channel shows as Active.
Step-by-step guide for each channel
Each channel has its own guide with prerequisites, screenshots, and troubleshooting. Pick yours:
Connect WhatsApp
Onboard a number through Meta Embedded Signup: new number, existing number, or Coexistence.
Connect Facebook
Link your Facebook Page so every Messenger conversation lands in your inbox.
Connect Instagram
Bring Instagram DMs from a Business or Creator account into your unified inbox.
Connect Telegram
Create a bot with BotFather, paste the token, and activate instantly.
Connect Email
Send and receive email via SMTP/IMAP. Settings for Gmail, Outlook, and Yahoo.
Website Live Chat
Add the WebChat widget to your site so visitors get instant AI answers.
Manage your channels
Everything lives under Settings → Channels, where each connected channel is listed with its status and its own Settings button.
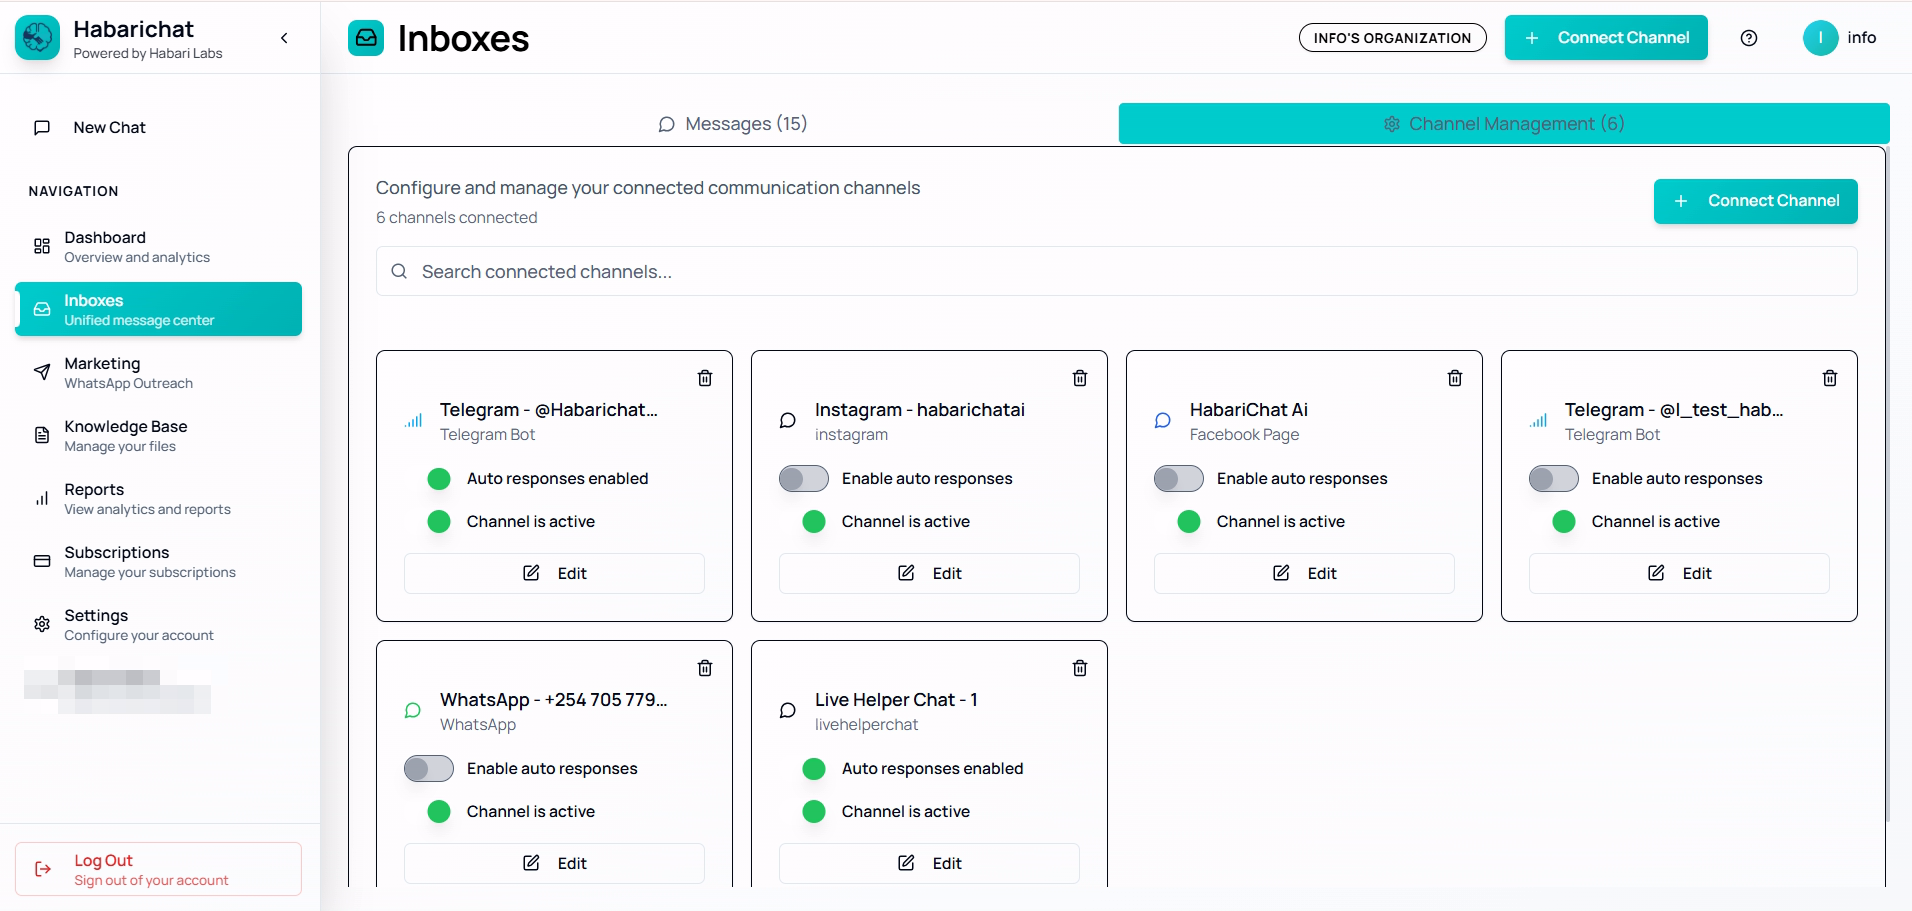
Edit a channel
- Go to Settings → Channels and find the channel.
- Click its edit/settings icon (gear or pencil).
- Update settings such as API keys, display name, or notification settings.
- Click Save Changes.
Auto-response & account status
- Enable / disable auto-response: toggle the auto-response switch on the channel card, then send yourself a test message to confirm the AI replies.
- Deactivate the account: stops new messages being processed by HabariChat while keeping all your old conversations, you can reconnect later without reconfiguring.
Delete a channel
- Go to Channel Management and find the channel.
- Click the delete (trash) icon.
- Confirm when prompted.